🚀 Upgrade your board’s storage game with speed and endurance that means business!
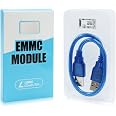
The Libre Computer 16GB eMMC 5.x Module delivers ultra-fast flash storage optimized for Libre Computer Boards, boasting up to 250MB/s read speeds and 10K random IOPS. It offers superior endurance over MicroSD cards, eliminates SSD latency by removing the USB bridge, and supports all major operating systems, making it the ideal embedded storage solution for professionals demanding reliability and speed.
| Hard Drive | 16 GB Usb |
| Brand | Libre Computer Project |
| Series | EMMC-5X-16GB |
| Item model number | EMMC-5X-16GB |
| Item Weight | 1.13 ounces |
| Package Dimensions | 4.84 x 2.56 x 0.75 inches |
| Color | 5.x |
| Hard Drive Interface | Solid State |
| Manufacturer | Shenzhen Libre Technology Co., Ltd |
| ASIN | B077D4TWL8 |
| Is Discontinued By Manufacturer | No |
| Date First Available | November 13, 2017 |
R**T
Got it to work even with the lack proper instructions
The online instructions for the Libre Computer Renegade ROC-3328cc were only useful for mentioning the installing the operating system from the SD card and that was it. So, the first thing to do is delicately plug the eMMC module in. Ignore the completely useless USB cable. Plug in SD card with an OS in my case Ubuntu desktop. Boot the computer after the desktop is up I used RPI-Imager installed from terminal (sudo apt install rpi-imager) I also installed gparted to see that the module is there. I had the server image on a flash drive chose the custom image chose the Ubuntu image I got from Libre Computer in the RPI Imager and chose the destination as the eMMC. Let the imager run when finished shutdown remove the SD card and boot. This was by far the easiest and less headache-inducing option.
J**N
4.5 only because I wish it came with the holding screw for the modual.
I had to go source a new screw is my only complaint on this- Price is great, fit perfectly on my Libre la frite - *You'll need to know how to push firmware but there many tutorials out there on that-this would have been an easy 5 star had it not been for that dang holding screw!
A**R
Worked
Way faster then the Sd card, and was easy to set upInstall the desktop version of raspben on the Sd card and use the imager to flash what ever you want on to the eMMC
C**C
Easy to install.
Used for temporary storage of files during processing. Access is quick, no problems encountered.
A**3
Don't buy this trash
Bought this for my le potato because my SD card is a very old 4gb card well let's just say that was a big mistakeThis thing is not easy to setup what so ever which is not good, I followed the steps on the libre website to flash the emmc module with Linux and nothing happened no USB mode at all tried again and still nothing (i got no error just didn't work) then I tried to just use my SD card to flash it which worked but here's the issue if you want to boot into the SD card so change the img on the emmc good luck because it auto boots into the emmc and I can't find a way to boot it on the SD card to install a new img plus there partition reflash also doesn't work so the partition on the emmc does not get deleted so im stuck with raspbian on the emmcUPDATEI figured out what to do to reflash it after it is flashed what you have to do I have Linux on a SD card then disconnect the emmc then put the SD card on then boot from the SD card automatically then you plug in the emmc but after you do that you have to bind the emmc so it's able to be seen on the is then you can reflash it still keeping 1 star since everything thing else they claim you can do to make it work doesn't work
M**C
Not for inexperienced Linux users nor first-time SBC users
The 3-star rating is more for the overall experience than just the device itself.The first complaint I have about the eMMC module is that there's no way to firmly secure it to the board. I suppose it'll hold itself in the socket fine, but it's very easy to remove, so I'm not convinced that I won't need something to hold it down. I ended up using a piece of adhesive strip that just happened to be the same thickness as the gap between the eMMC and the board. You could probably use a small dot of hot glue, too.Like other reviewers have mentioned: if you're new to Linux and SBCs, this will be very difficult for you. if you got a new Le Potato or Renegade have little or no experience with Linux, I would recommend that you stick with a SD card and forget about the eMMC for now.Not sure about the Le Potato, but with the Renegade, the boot order seems to be: 1) eMMC, 2) SD Card, and 3) USB. And it seems that if the eMMC has something bootable, the bootloader will attempt to load it even if it's not compatible with the Renegade and won't actually boot, so it just hangs forever. And because the bootloader doesn't use the HDMI, there's no output -- you'll have to use the UART to get a serial console to see what's happening. So even experienced user can be left hanging without any clue about what's wrong!These eMMCs seem to have something already loaded onto them (some other reviewer said Android), which is bootable but isn't correct for the Renegade, so it doesn't ever actually boot. But the bootloader isn't capable of detecting this and then moving onto the next device (SD card), so the Renegade just sits there with the red and green solid LEDs. This threw me off for a good few hours.Someone who's new to Linux and/or SBCs might assume the eMMC is faulty or that their Le Potato or Renegade is faulty -- bad experience!Once I figure all that out, I had no trouble getting 6 of these working on 6 Renegades. Here's the process for getting a Renegade to Armbian from the eMMC:1. Use Balena Etcher or Rufus to load the Armbian image onto a Micro SD card -- an 8GB is enough for this purpose, it'll only be used once.2. Get a USB flash drive formatted as FAT32 and copy the Armbian image file onto it (don't use Etcher or Rufus for this step, just copy the image as a regular file -- you'll need this later).2. Prepare the Renegade: insert the Micro SD card, but do not attach the eMMC module, and do not attach the USB flash drive. Do not attach the HDMI cable just yet, either. You may attach a keyboard, though.I had to leave the HDMI disconnected because, during the boot-up, Armbian would somehow get "confused" about the resolution of the monitor I was using (I guess it was using EDID to read the native resolution, but that failed for whatever reason), and I would never get a picture. It wasn't until after the boot-up was complete that I could attach a monitor, as by then the resolution defaulted to 1024x768. This might only be a problem with my monitor, so you might not need this step.3. Power-up the Renegade and let it boot from the Micro SD. You'll see the red and green LEDs turn on solid for several seconds, then the red LED will flash a heartbeat pattern, and the green LED will flicker to indicate disk activity (this is custom behavior in the Armbian OS that's different than what the Libre documentation will describe).4. Wait a few minutes for the boot process to complete (the green LED will stop flickering). If you've used a large Micro SD card, this could take a lot longer, as Armbian will resize it's partition on the first boot.5. When the green LED hasn't flickered in a while, the boot process is probably done. Now you can plug in the HDMI cable, and you should see a prompt to change the root password (if not, login with root/1234, then you'll get the prompt to change the password). The second prompt will be to choose a shell (bash or zsh). The third prompt will be to setup a user -- just [CTRL]+[C] to skip this.6. Now you should be at a waiting shell. Carefully attach the eMMC (doing this while powered on can be risky, depending on how steady your hands are, but it's the only way to prevent the bootloader from trying to boot the eMMC).7. Now execute `ls -l /dev/mmcblk*` and you should see several devices, some are "mmcblk1" and some are "mmcblk2" -- one of those is the eMMC, the other is the SD card. If you only see a "mmcblk1" and not a "mmcblk2", then Armbian isn't seeing the eMMC.8. Now execute `df -h` to get a list of mounted volumes. Take note of which "mmcblk" that the root is pointed to -- that's the SD card. So if "mounted on" is "/" and "filesystem" is "/dev/mmcblk1p1", then that means "mmcblk2" is our eMMC.9. Connect the USB flash drive from Step #2, then execute `mount /dev/sda1 /mnt` -- if no errors, then you should be able to `ls /mnt` to see the Armbian image file on the USB flash drive.10. Now we'll write the Armbian image to the eMMC.If the image you chose has a ".img.xz" extension, then use this:`xz -cd /mnt/Armbian_23.5.1_Renegade_bookworm_current_6.1.30.img.xz | dd of=/dev/mmcblk2 bs=1M status=progress`If the image you chose has the ".img" extension, then use this:`dd if=/mnt/Armbian_23.5.1_Renegade_bookworm_current_6.1.30_minimal.img of=/dev/mmcblk2 bs=1M status=progress`Of course, use the filename of whatever image you actually downloaded.11. After a few minutes, you'll be back at a waiting command prompt. You can run `shutdown -P now` to shut down and power-off the Renegade. After all LEDs are off, remove power, then remove the SD Card and USB flash drive. Re-apply power, and it should boot into Armbian from the eMMC.Note: if you get no picture during boot-up (red LED is pulsing a heartbeat pattern, green LED is flickering to indicate disk activity), then you might have the same problem I had with my monitor (described in step #2). In that case, just as before, leave the HDMI disconnected before powering on the Renegade, and wait a few minutes after the green LED stops flickering, then connect the HDMI and you should get a picture with 1024x768 resolution. You can then edit `/boot/armbianEnv.txt` and add:"extraargs=drm_kms_helper.edid_firmware=HDMI-A-1:edid/1024x768.bin video=HDMI-A-1:1024x768"(without the quotes) to force the display at 1024x768 (or whatever resolution -- just look in `/lib/firmware/edid` for available resolutions).
M**N
Makes the lepotato faster
This makes the lepotato perform better and should last longer than SD cards. Installation was simple and the image installation a few commands.
R**L
It's working
It is definitely faster than Micro SD. it took me a while to get things working exactly how I wanted, and I used an alternative method, but it is now booting and running fine from this eMMC card.
Trustpilot
1 week ago
2 months ago