🎨 Elevate your textile game with endless color and zero limits!
The Welacer DTF Transfer Film Roll (13" x 328 ft) is a professional-grade, double-sided coated PET heat transfer paper designed for direct printing on all fabric types and colors. Compatible with major inkjet and DTF printers, it offers vivid color reproduction, no-weeding convenience, and flexible cold or hot peel application—perfect for high-volume, multi-material textile customization.

| Manufacturer | LL-DTFF06US-WL |
| Brand | Welacer |
| Item Weight | 8.97 pounds |
| Product Dimensions | 5.3 x 5.3 x 13.1 inches |
| Item model number | LL-DTFF06US-WL |
| Color | clear |
| Number of Items | 1 |
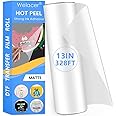
| Size | 13in x 328ft |
| Sheet Size | 13 inches |
| Paper Weight | 45 |
| Paper Finish | Coated, Matte |
| Manufacturer Part Number | DTFF06 |
Z**C
Works GREAT with sublimation inks - See Tips and Samples
The product will most likely produce the best quality with a DTF printer, but they are extremely expensive for the amount of fabric printing I do. I tested using an Epson Sublimation printer and after perfecting the temperature and pressing time, I was super happy with the results. So, contrary to manufacture's statement, which reads, "Must use with DTF ink. Regular ink, sublimation ink can not be used, with the same brand DTF transfer film, DTF ink and hot melt powder, the transfer effect is more perfect." While that may be true, for a more "perfect" transfer, I disagree entirely that "sublimation ink can not be used". YES! Sublimation ink can be used. :-)What did I use:Epson SureColor F170 sublimation printer with genuine Epson Sublimation inksWELACER DTF Transfer Film SheetsGodora Transfer Powder (DTF White Powder Hot Melt Adhesive) - You can not skip this step!VEVOR Heat Press (12" x15")Tips:PRINTING ON THE TRANSFER SHEETS: This slowed down the process but made it fool-proof 100% of the time. These sheets are very thin. Putting a single (or multiple sheets) in the printer tray caused a misfeed, and printing started midway down the sheet which ruined that sheet. When that happened, I didn't want to ruin any more sheets, so I taped the top of the sheet to copier paper (glossy side of transfer sheet against the paper so it prints on the dull side of the sheet). I used only a sliver of tape (about 3/8" in length) on the top left and top right. I place only one set of taped sheets at a time in the tray. It fed perfectly each time. I prepared all sheets with the copy paper so it was ready to use when I needed it)APPLYING THE HOT MELT POWDER: Immediately after printing, carefully and quickly remove the copy paper, lay the transfer sheet on a flat surface (I use a 3" deep 11 x 14" bin), shake the transfer powder over the entire printed area, fully covering it. Let it rest on top for a few seconds; at least 15. Grab the sides of the sheet firmly, lift the sheet and curl the sheet, allowing the powder to roll from side to side, top to bottom over the printed image; don't agitate, you might smear the printed image. Slide all excess powder off the sheet and into the bin. Holding the sheet firmly along the edges, Gently tap the edge of the sheet inside the bin to release remaining excess powder. Visually examine the sheet. If you see excess powder on the non printed areas, gently tap again.CURING THE POWDER before the transfer: The powder needs to "set". There are special ovens for this, but you don't need the additional expense. I use the heat press, about an inch away from the platen, and place the transfer sheet (of course, powder side up) and leave it under there (380 degress) for 3 minutes. PLEASE TEST YOUR OWN SETTINGS!During these 3 minutes, I empty the bin of the powder, into a small plastic container so I can re-use it. I see people (on DIY videos), emptying it back into the original container. Why? You might end up mixing unwanted particles with the unused powder. In a small container you can see and remove any unwanted particles. But, that's just me.TRANSFER IMAGE ONTO SUBSTRATE:I highly recommend you "sacrifice" an actual garment that you plan to transfer onto, and test small areas at a time, multiple times on the test garment until you find the best temperature and timing. For my equipment, 380 degrees, at slightly more than medium pressure for 40 seconds yielded the very best results. Always press the garment first for about 6 seconds to remove wrinkles and moisture. Even though the powder has been baked, it can still be damaged if touched. So, eyeball the placement carefully before placing the transfer sheet onto the garment. It can be very slightly nudged if you need to reposition it, but I would not recommend it.REMOVING THE TRANSFER SHEET. Welacer states that the transfer can be removed while it is still hot (or cold). This may be true for DTF inks, but I found that for sublimation inks, WAIT until it is fully cooled off. Removing warm tugs at the fabric and takes a bit of effort to remove. It generally doesn't damage the image, but it will pull on the fabric and can nick off part of the image. When fully cool, it lifts off effortlessly, and no tugging at the garment.Important to note about this Seller: This is my second order of this product. I needed more sheets to finish a job and was thrilled that they were offering a nice discount this time around. Unfortunately, the discount was most likely offered because ALL OF SHEETS had fingerprint marks along two of the edges. Luckily, it did not interfere with print area, but, I am extremely disappointed. I would rather have paid full price if I thought the discounted product would be defective. The worst part: They inserted the sheets INCORRECTLY into the cellophane wrapper. There's a sticker on the wrapper that states "Print Side". The print side is dull and the non-print side is shinny. However, the difference between the 2 is very slight, so you have to view it at an angle to make sure. Well, these were inserted wrong. Had I NOT already worked with my first order (which was packaged correctly) I would have ruined a sheet or two. This would have been disastrous for a first-time user. There are other DTF Transfer sheets out there... I will try others before I trust this vendor again.
C**L
Love the hot peel
UPDATE on 6/9/25: Seller sent me replacement film and the new roll works great. The first roll must have been a bad lot. Pleased that they went out of their way to make it right!.ORIGINAL POST: This film sucks. It lifts before you get the transfer on the shirt. Also the ink flakes right off before you can bake.
L**Z
Funciona
👍🏻
J**N
Triggers pinch roller waring on Roland BN-20D. Film is slightly too short in width.
Overall so far so good. Haven't found any scratches or imperfections with the 17 in hot peel dtf film roll. Using in a Roland BN-20D and other than 17 in film doesn't exactly fit as it triggers the pinch roller waring. The film is just a bit too short to make contact with the pinch roller and the gripped section of the metal contact roller. They should produce a 20 in wide dtf roll.
A**E
Check your film before use always!!!!
I have been going insane for 3 weeks straight fighting the company I bought my printer from just losing my mind seriously loosing it until I finally looked super close to the paper seeing that that was what ruining all my images the paper had these lines in it I’ve gone through so much ink and film waisted so much money lost clients I mean it was bad I’m just in disbelief smh I can’t believe the problem was the paper the whole time
B**Z
Great prints!
Love this hot peel dtfilm. Will be buying regularly.
G**Z
work perfect
work perfect
J**K
Awesome hot peel but film is uneven when installed on roller.
The prints are great on the film. But there is a slight lift on one side of the film. I have had to load another roll from another company and the new roll was laid evenly. Not sure but I believe it is a manufacturer defect when it is put on the roll.
Trustpilot
5 days ago
1 week ago