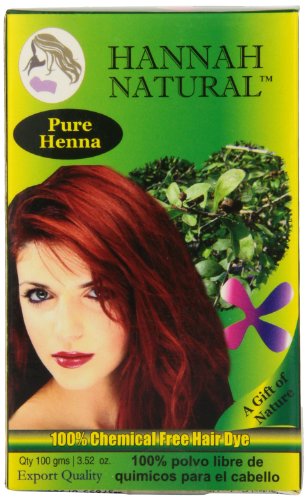


🌟 Unleash Your Natural Beauty with Pure Henna!
This 100% Pure Henna Powder is a chemical-free, all-natural herbal product sourced from India. Each pack contains 100 grams of pure henna leaves, designed to condition your hair while providing a vibrant color. The kit includes two 50-gram packs, gloves, a shower cap, and comprehensive instructions for easy use.
A**D
Non-Toxic Hair Colorings with benefits....
I rarely write any reviews but I have to brag on these non-toxic hair coloring product. I have been looking for a very long time for something non-toxic to color my hair. Here is my experience: I have fine and slightly curly (frizzy) hair that is now a natural salt & pepper color (more salt than pepper) and my husband has soft but not as fine hair that is now naturally all salt color.My husband was very skeptical but as a cancer survivor had been urging me to find an alternative to the harsh coloring chemicals that we were previously using.I used myself as the "guinea pig" and did my hair first. To give you some background, I did not color my hair for almost a year and did not use any conditioner when washing my hair for that same period. My hair didn't have any chemical build-up.I purchased the following 3 products from Amazon and used the following recipe:- 50 g Hannah Natural 100% Pure Henna Powder, 100 Gram (Red/Copper Color)- 50 g Hannah Natural 100% Pure Indigo Powder for Hair Dye, 100 Gram (Black Color)- 2 tablespoons Hesh Herbal Amla / Indian Gooseberry Powder For Dark & Healthy Hair Naturally - 100 gms hesg (Conditioner Powder)- Dash of regular table salt (helps to release colors)I mixed these dry ingredients ensuring that there are no lumps.Then I mixed in:- 1 tablespoon Olive Oil (makes it much easier to work with and saturates much hair better)- 1 tablespoon Lemon Juice (also helps to release colors)- Few drops of aroma skin quality essential oil (optional - decreases strong tea-like smell, because I don't like tea or its smell)- Hot water - about 1.5 cups, enough to make cake batter consistency mixture.I used a hand whip from my kitchen to ensure it was properly mixed and lump free.Then I let it sit till it cools down enough so as not to burn my scalp. When cool, I saturated my whole head - actually over-saturated - and worked it into every strand of hair ensuring that every strand had equal coverage.Then I got some paper towels and rolled them into a loose roll to wrap around my neck as a drip catcher. Then I used plastic wrap from my kitchen and wrapped my whole head with it, catching the upper edge of the paper towel roll to keep dripping to a minimum.Then I set my timer for 1.5 hours.I was really excited to rinse my hair and see how it came out. I was absolutely delighted!!! My natural color is dark brown and this new color was slightly more like a dark copper brown color and turned out beautiful. My color looks very natural and suits my skin tones.My first coloring lasted 2 months and then I was starting to see some white peeking through. So, I did it again. I have attached a picture that shows the top of my head about 2 weeks after my second coloring.Now my husband was a different story. He is much more conscious of his "salt" colored hair. He insisted on keeping the store bought colorings going until he could see how my Henna coloring came out. He is also a huge fan of hair conditioner. So, his hair had a great deal of chemical build up.For my husband's first coloring, I used the same recipe that I had used on my own hair. Unfortunately, it turned his hair an orange/red. It was by no means an ugly color just not very natural looking with his skin tone. After some trial and error colors (we did about 3 colorings in one weekend, we came up with the perfect color combination for him).His natural color is an ash brown color. To get close to his natural color that would work for his skin tone, I used the following recipe on his hair and it came out a darker brown with a slight tinge of copper when the light hits it the right way..... looks very healthy and natural..... makes him look very handsome.Here's the final recipe that worked well on my husband25 g Hannah Natural 100% Pure Henna Powder (Red/Copper Color)75 g Hannah Natural 100% Pure Indigo Powder for Hair Dye (Black Color)2 tablespoons Hesh Herbal Amla / Indian Gooseberry Powder For Dark & Healthy Hair Naturally (Conditioner Powder)Dash of regular table salt (helps to release colors)I mixed these dry ingredients ensuring that there are no lumps.Then I mixed in:2 tablespoon Olive Oil (makes it much easier to work with and saturates much hair better)2 tablespoon Lemon Juice (also helps to release colors)Didn't use any aroma essential oil because my husband loves tea and the smell of tea.Hot water - about 1 3/4 cups, enough to make cake batter consistency mixture.I used a hand whip from my kitchen to ensure it was properly mixed and lump free.Again, I let it sit till it cooled down enough to put on his scalp. His scalp was much more sensitive than mine, which mean the mixture was hardly luke-warm. I then over-saturated his whole head and worked it into every strand of hair ensuring that nothing had been missed.Then I wrapped the paper towel around his neck and wrapped his whole head with plastic wrap and set the timer for 3 hours (double the time I needed).At the end of the 3 hours, his hair was amazing.So, please don't discredit these non-toxic products if your first try didn't work like you had hoped. Sometimes, you have to do some trial and error colorings till you are pleased with the results.Additional benefits that we have discovered when using these products are:- the hair fall-out has decreased significantly. We used to have a huge ball of hair on the shower floor drain after each hair washing. That has now decreased to just a few hairs after each washing.- another change is that we no longer use conditioner after shampooing. Our hair is soft and fluffy and easily managed. A little hair spray keeps it in place all day long.- the color also seems to last much longer than the store bought colors we previously used. I always did my husband's colorings and had to ensure that I made time every two weeks to color his hair. Now, I do his coloring's once a month or so.- the price for each coloring has also significantly decreased, leaving me more shopping money.
J**.
Love it!
I did a ton of research before I used it and while it was on my head. I read that if it's your first time to only leave it in for 2 to 3 hours so you don't risk drying out your hair.I think it turned out really well but I want it a little brighter red. The blonde on my ends turned orange and I want to remedy that so I plan on buying more to fix it. But the color on my natural brown virgin hair turned out nice. It is definitely difficult to use. I applied it to damp hair as a lot of articles read that it doesn't make a difference in color and it is easier to apply on wet hair.My hair is waist length. Fine, but there's a lot of it. I used about a pack and a half, so about 3/4 of the box. I only mixed the powder with water.Will definitely buy again.
H**Y
Amazing Color
I love this product. The instructions may not be all you need. I did quite a bit of online research. I prefer a brighter red and am starting with light brown hair, with a dash of grey here and there.So here are some ideas that work:1. Make sure you mix the powder the night before. I have been mixing mine in a gallon zip-lock bag. When it is time to use the henna, I snip off a corner to help me get to the roots. In other words, this device helps you get to the roots.2. Brighter Red (for one packet): I mix in a tablespoon or two of turmeric, five cloves, juice from a medium size lemon, a splash of apple cider vinegar. The first time I used only vinegar, and it stripped my hair a bit. If you still need moisture, I add a little bit of water. So the trick is to not make it too wet, or it drips and becomes messy. My consistency is probably likened to tomato paste, a little thicker than ketchup.3. Sleep with it in your hair. I keep it on for a long time. This helps it reach the roots. I add it to my hair as instructed above. I have long hair down to my mid back, and I twist the rest of in a bun. Lately, I have been using just one of the packets to do my roots, it does not cover all of hair. Do not forget to put a dark colored towel over your pillow. Unless you hate your pillow.4. Put an oil or Vaseline around the border of your scalp to prevent dying the skin. Do not get oil on hair though, this may prohibit absorption.5. Stop whining. Needless to say, I have read other reviews online that it is messy. It is. You will get better at being less messy. My gloves broke and my hands were orange for about two weeks. It is a good idea to use the gloves when you are washing it out of your hair too. The henna can get under your nails. Unless you want that "I've been playing in the dirt" look.6. I rinse it out maybe mid day after sleeping in the henna. Do not use shampoo. You can rinse most of it out with water. Actually, this last time I omitted conditioner too. Leave it alone for three days if possible, the color develops. I mostly shampoo with shampoos that are supposed to help with color. Another woman told me her mother used to put henna in her shampoo to help keep the color fresh. Have not tried that yet.7. Word to the wise. Try to prevent the henna from drying. It makes it tougher to get it out of your hair. Try your best to keep it covered with the shower cap. If I have to run an errand, I put a hat on over it. Knitted hats usually work best. I imagine that the added heat may help the color develop as well.Sound like a lot of trouble? Well, try to be less lazy and count the amount of chemicals in non henna hair dye. No thanks. The smell bothered me a bit at first, but I have grown to like it. It's the smell of health. It does not burn your scalp the way chemicals do. In fact, it is a conditioner. I used to have issues with dandruff, that is completely gone now. I really love Henna. I get a lot of compliments on my hair. It is truly beautiful.Namaste.
Trustpilot
3 weeks ago
3 days ago