


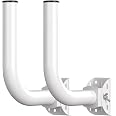
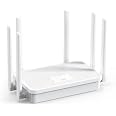
Wireless Bridge Outdoor with 2 Bracket: UeeVii CPE452 Point to Point 5.8G Long Range WiFi CPE - Work with Starlink - Extend Network to Shop Barn Garage, with 14DBi Antenna 24V PoE 2 LAN Port 2Pcs
Details
- BrandUeeVii
- Hardware InterfaceEthernet
- ColorWhite
- Compatible DevicesComputer
- Product Dimensions9.84"L x x
- Data Link ProtocolIEEE 802.11a

Description
🚀 Bridge the Distance, Own the Connection!
- LONG RANGE 3 KM COVERAGE - Keep your network strong across up to 3 kilometers (line-of-sight), ideal for sprawling properties or multi-building setups.
- BUILT TO BRAVE THE ELEMENTS - IP65-rated rugged casing with a high-gain 14dBi antenna ensures uninterrupted performance rain or shine, dust or frost.
- PLUG PLAY 5 8 G HZ SPEEDSTER - Pre-configured dual bridges with 15 channels on the 5G band deliver faster, interference-resistant connections for your barn, garage, or remote workspace.
- SEAMLESS 300 MBPS OUTDOOR LINK - Experience ultra-reliable point-to-point WiFi bridging with up to 300Mbps bandwidth—perfect for extending your network beyond limits.
- EFFORTLESS POWER OVER ETHERNET - Simplify installation with 24V PoE support—no messy wiring, just plug in and extend your network seamlessly.
The UeeVii CPE452 Wireless Bridge is a robust outdoor WiFi extender designed for point-to-point network expansion up to 3 km. Featuring dual 100Mbps RJ45 ports with a combined 300Mbps throughput, it operates on a 5.8GHz band with 15 channels for high-speed, low-interference connectivity. Its IP65 weatherproof housing and 14dBi directional antenna ensure reliable performance in harsh outdoor conditions. Compatible with Starlink and powered via 24V PoE, it’s ideal for extending internet access to remote buildings like barns, garages, or surveillance setups without complex wiring.
Have a Question? See What Others Asked
Reviews
C**E
CPEs work well
Overall, this product is very good and is cheaper than competitors (i.e. overpriced Ubiquiti) but the configuration & doc can be better. Tech support via email is very good if you're okay with next day response. The casing does not seem fade by the Summer sun light.If your needs is inline with what the product is designed for, it's very easy to configure. You'll just need to plug in a few things and set one to A (Master or Bridge) and the other to B (Slave or Station) per their document. You'll be able to hook up a single device like security camera onto the Slave CPE. Other people did well showing how to do that in their comment. However, if you have a more complex needs, like having a whole network on Slave side, you'll need to do more. Read on. Perhaps I can help here.First, you should review the images attached to my comment, especially the networking diagram that I wanted to achieve. In short, on the Slave side, I have a whole network that MUST have the same subnet (i.e. 192.168.5.XXX) of the Master side. If you don't need both sides having the same subnet, you can choose to follow my steps (for bonus feature below) or perhaps connect a ROUTER on the Slave side to control IPs. In my case, to keep the same subnet, I cannot use a router.The way you set this up is 1,2,3:1) Set up both Master's & Slave's IPs to the existing network's subnet (ie. 192.168.5.xxx) instead of their default (192.168.255.xxx)2) Sync the 2 CPEs on the Admin page.3) Test before deployment.Details:After you did basic steps to set up CPEs to A or B, and sync them (let's say, to C channel w/ IP 192.168.255.112 and 212), then...a) Config Master: Connect its power plug-in's POE side to 1 Cat inlet on the CPE. Connect your laptop to the 2nd Cat inlet on the CPE. Change your laptop's IP to static IP at 192.168.255.7 (or any available 8, 9, 10... on the last digit). Open a browser and type in URL: http://192.168.255.112 to connect to the Master CPE's Admin page. UserID/pwd: Admin/admin. Now, do 2 tasks: (a) Click on Wireless & write down the SSID & password. You'll need them soon. (b) Click on Network & change its network IP to 192.168.5.12 (my subnet is 192.168.5). Save the changes. This will disconnect you from Admin page b/c CPE now has a new IP. Trust it's saved.b) Config Slave: do the same physical connection between your laptop and Slave CPE. Connect to its Admin page at http://192.168.255.212. Click on Network linke & change its network IP to 192.168.5.22. Save it.At this time, the CPEs should be out of sync, and you can only sync them via Admin page. If you check the CPEs now, you should see they have different channels and if so, the Strength signal lights are 0. In such case, keep going... you're almost there... just 1 more step.c) Change your laptop IP to 192.168.5.7 (or any available digit). On browser, type 192.168.5.22 (Slave's new IP) to access the Slave CPE's Admin page. Click on Wireless link and scan for SSIDs. Select the Master's SSID and enter password (did you write them down in step a?). See image. You should notice both CPEs now have the same channel (A, B, or C...) and the Strength lights are at max.IF, for any reasons, you want to check or recover the Master's SSID/pwd, you can do so by physically connect your laptop to Master CPE. Make sure your laptop now has IP as 192.168.5.xzy. On a browser, type in 192.168.5.12 (Master CPE's IP). Click on Wireless link, and you should see them.Muy bien! Now you're done w/ configuration! Congrats.Testing. You can unplug your laptop and test your network before deployment:i) Change your laptop's IP to Dynamic IP (DHCP). This is to confirm the router on Master side can push new IPs to the Slave side.ii) Connecting all components as a real, yet simple, network. Review the networking diagram as needed. On Master side, you should have Internet->Router->Master CPE .On Slave side, you should have a Switch->laptop and other devices.Your laptop should have IP as 192.168.5.xyz and be able to browse the Internet. If so, you're all set for deployment.A huge bonus for this configuration is this... Since your computer and CPEs are on the same subnet, you can access their Admin pages any time without having to physically connect to each CPE. All you need to do is, on a browser, type in 192.168.5.12 or 22 to access them. Total control of the whole network at your fingertips.Hope this helps someone.
T**M
Easy hook up
Easy to get going. About 100’ separation.Doing about 80 mbps download out of 260 mbps available. Would by again
A**I
Works very well
Good product, excellent tech support. Definitely a cost effective way to extend wifi. The instructions suffer from translation.
B**Y
Network bridge does the job.
Item received promptly, easy installation, works great!Would buy again.
E**K
Too easy works great
Easy to install plug and play no special set up
B**E
Weak signal, poor design, vulnerable to radio interference from the WiFi router.
I attempted to use this system to provide internet connectivity using a Wifi access point located in an enclosed summerhouse approximately 225 feet from the main house, connected to the router in the main house via this system.The item description says it can cover three kilometers, so my application seemed reasonable. The two units were able to pair, but with weak signal--2 out of 4 on the LED scale provided. So, one star off for weak signal.The system can provide its own Wifi access point--but only at the main house end, not at the summerhouse end. The antenna you set up at the main router sets itself up automatically as the Wifi access point. You have no control over this. If you want Wifi at the remote end--the summerhouse end, in my case--you have to buy a separate access point for that end. This is a completely ass-backwards design choice. Would anybody in the market for a unit like ths not already have Wifi at the main house? You need a Wifi access point at the remote end, not the main end. That's why you're doing this in the first place! Another point off for thoughtless design.So I got the two antennas to pair and hold pairing. Then I set up a nice new access point. As soon as I plugged it in. the antennas lost pairing. As soon as I unplugged it, the antennas regained pairing. Back and forth, like a lightswitch. It's obvious that this system is vulnerable to interference from the Wifi access point--which you need to make the whole concept work. Another point off for a second level of bad design.The weak signal created a third problem: the system was very picky about where it would and wouldn't work. I wound up having to put it on a different floor from the main router. Now I'm looking at having to run Ethernet from one floor to the other to make a WIRELESS system work. A fourth point off.So, this unit and the nice new router go back and we try something else.
T**C
Extend stalink to metal building
This works perfect to extend starlink to our Barn that is over 400 ft away. The Barn has a living space that is use by kids for gaming. The signal is strong and creatures no lagging for their games.
Common Questions
Trustpilot
1 week ago
1 month ago
