🚪 Close the deal with confidence—Dynasty Hardware3000-ALUM means business.
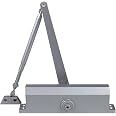
The Dynasty Hardware3000-ALUM is a commercial-grade, size 3 door closer featuring a non-handed design for versatile left or right door swings. Certified to UL and ANSI standards, it offers reliable, durable performance with a sleek sprayed aluminum finish. The package includes all necessary components for quick screw-in installation, making it the go-to choice for professional-grade door control.
| Item Weight | 0.01 Ounces |
| Installation Type | Screw-In |
| Specification Met | UL, ANSI |
| UPC | 636134553695 |
| Manufacturer | DYNASTY HARDWARE |
| Part Number | DYN-3000-ALUM |
| Item Weight | 0.01 ounces |
| Product Dimensions | 13 x 3.6 x 4.4 inches |
| Country of Origin | China |
| Item model number | DYN-3000-ALUM |
| Is Discontinued By Manufacturer | No |
| Size | 3 inches |
| Finish | Sprayed Aluminum |
| Pattern | Door Closer |
| Item Package Quantity | 1 |
| Mounting Type | Non-Handed for Regular Arm, Top-Jamb or Parallel Arm Installation |
| Included Components | Closer Arm, Door Closer Body, Screws And Fastners, Parallel Arm Bracket, Instruction Manual |
| Batteries Included? | No |
| Batteries Required? | No |
R**D
Great door closer at a price half or less what others wanted. Recommended.
In brief...1> Great unit, works very well. I have a heavy outside-opening security screen door that needed a closer, this handles the job with ease. Obviously my metal screen door, while heavy-duty frame/screen has weight, is much lighter than a real metal door or solid wood door. But there's no way the light-duty $20 closers at the big box stores could handle this much mass, I'd go through them like chicklets. This thing is perfect for my door and needs.2> There are three different ways to mount this closer, so I had to kind of sort through my options and decide which one would work best in my situation. Two of the options would have worked OK, but one proved to be simpler, when I held the closer up to the door where it would be mounted. You really have to be holding it in your hands, and hold it in place before you can be sure that all the screw holes on the door and door frame will line up OK.3> It comes with a decent "template" for where the mount holes go, on the instruction papers. They worked great, just follow the directions - bend the paper here to expose an "edge" to match the door edge, then cut or fold as needed to situate the template right, and tape it into place (use good tape, there will be forces trying to dislodge it as you work).4> Some reviews mention confusing instructions, and I have to admit - they seem to be written with general contractors in mind rather than average Joe citizen who does this once and never again. Really, it was holding the apparatus up against the door where the template showed it needed to go that suddenly clarified a lot of what I had read. You have to do both... read the instructions, and physically hold the equipment in place, then read again if something is unclear. Holding the things in place provides that "ah-HA!" moment that will let you proceed with confidence.5> They offer some videos on their website that helped me - but each is for a different mounting technique. Pick the wrong one, and their video makes no sense. Pick the right one, and you'll have much more confidence that this is not really all that difficult. The right video helps a lot.6> I had to go to Ace (a hardware store, any would do) to get the right screws for my specific door situation. I have a metal door, with a 1" hollow metal square tube as the mounting point. None of the provided screws would work, since those that were short enough were just bolts - not tapered or "self-tapping" - and the various screws that were included were too long - clearly intended for 2-2.5 inches of wood. Ace had what I needed, and I found out that a # 14 screw and a quarter-inch screw are the same cross sectional thickness. Well. You should learn something new every day, right? Four #14 x 3/4" screws later, I was all set. Just be aware - they can only anticipate the most common mounting arrangements and supply screws for those. My situation was NOT those, so... you might need special screws, as I did.7> The closer itself, once mounted, works exactly as desired. The instructions about adjusting the speed of the door closing movement and the 2nd adjustment for the "last 10 degrees of travel" (slower but firm, to click the latch) all worked as expected, good instructions for that part. The included allen wrench for those two screws was all I needed, the adjustment took 3 minutes, maybe less. Very straightforward and easy (to me).To conclude, I found excellent value here. For half or less what others were priced at, I got a great door closer that installed fairly easily and handles the weight of this oversized metal screen door with no problem at all. The action is fairly stiff, as I wanted, and the last 10 degrees of "don't slam, but close firmly" works perfectly.I highly recommend this unit if you have similar needs for something larger than the little, flimsy closers that are everywhere for $20, but don't want to spend $80-150 on a commercial closer. Five stars, well deserved, highly recommended.
D**Y
Farmhouse panel door install.
works great, I was only able to install using the parallel mount. I had to make a few minor modifications because I have an older (thinner panel door). I had to use shorter screws because the spring body's lower bolt holes lined up with the first thin panel. I used longer screws for the top mounting holes through the meat of the door first then used some shorter screws I had for the bottom. The template made installing so much easier. I still watched a couple videos first before installation.
G**M
Use this on a solid door or...
Make sure you install this on a solid door or one that was something to screw into besides foam. My backdoor is mostly foam inside for insulation so I could not install it there. It worked good on my garage door because it was solid. If you have stepped door jams this may or may not work well depending on where everything lines up. I am going to order another and use the sleeve bolts to address my foamy door issue. Over all this is easy to install, but the instructions and the template could be improved.
K**.
Anybody can install
Easy to install. They provide a template and explain exactly how to install depending on the type of door you have. We were able to install without any prior experience.
Y**D
Did the job
It does what it is advertised to do
K**M
Great value
Works great so far
R**N
Works Perfectly
Our office door (outside entry glass) has needed a new opener for a long time. After constantly adjusting it, the old opener failed completely. I was afraid it was going to cost several hundred dollars for a door company to come out and replace the old closer. I did some research and found this closer. It took me about 30 minutes in all to remove the old closer and install the new one. Super easy to install and it works great out of the box for our door.
W**D
Solved my door slamming problem on an exterior door, a few pitfalls to note
I am amazed at how well this worked for my 125 pound exterior door. We have open shelving on the wall next to this door and it would rattle everything so badly, and eventually vibrate items towards the end of the shelf where they could fall off. Little kids slamming the door etc was the biggest problem.It does the job 100% and there is zero wall rattle now.Read the directions carefully, and slowly digest the info to be sure which mounting style you want to use, as some door situations will force you to only have one choice. Ours required parallel arm style installation due to jamb, trim and also the fact that the interior space is limited on the inswing for this door (to right at 90 degrees before hitting a wall, which I have a bump stop for already).I have a Masonite steel door and drilled a tiny pilot hole to figure out if it was solid, it was not but the sheet metal was thick enough to use the self tapping screws. I would suggest drilling a pilot hole for a steel door as well, although smaller than the suggested wood (jamb mount side) so it can TAP it properly to be able to thread. All screws pulled in perfectly by hand after pilot holes.The included template works great just pay attention to everything, your hinge locations etc.A small word of warning, when you tension the nut to mount the arm it will pull the arm against your door, and you have soft paint on your door like me, it will likely mar it. It was minor but a warning to maybe put a piece of cloth or thick foam between the arm and door during this process would have saved it from a paint scrape.
Trustpilot
3 weeks ago
1 day ago